|
| Mounting your wall hood is similar to mounting island hoods, except that you can also use the wall to help stabilize the hood. Our hood interiors are easily removable to give you access to work inside, and we weld a heavy steel plate in the top of the hood to provide a solid mounting surface. Wall hoods often need to mount where there is no access from above, such as when there is a second floor above. When this is the case, all attachments have to happen from below. When the hood or stack is not too tall, you can reach the top and run screws up into structure above from inside. If the hood or stack is too tall and narrow to reach fasteners at the top from the inside, you can suspend the hood with screws through the back panel of the hood into structure in the wall. We provide pre-punched holes for this purpose, and you can drill your own holes as well. We recommend suspending the weight of the hood from the top if possible, and using screws through the back panel to pull the hood tightly back against the wall. | |
|
|
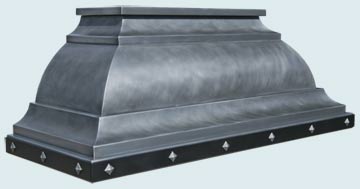
| This hood is relatively short and has no stack. This allows easy access to the top from inside the hood to run mounting screws up into structure above. There are 4 bolt holes at the corners for the fasteners. When there is a removable short stack, it can be installed separately from the hood. After the stack is mounted, the hood can be easily lifted onto the studs that we provide on the bottom of the stack and secured with nuts from inside the hood. | |
 |
| |
|
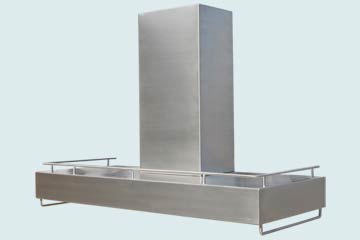
| Low profile hoods of this type use the stack as part of their support. Therefore the stack must be securely fastened to structure so that it can support the weight of the hood. The hood will bolt to the bottom of the stack, plus will be bolted into the wall to pull it tightly back to the wall and to support part of the weight. | |
|
|
|
|
| | |
|
|
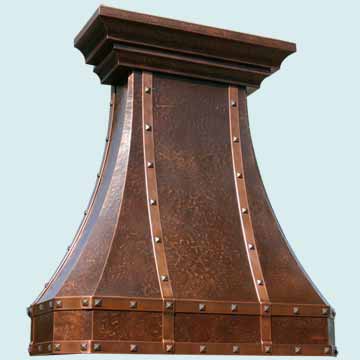
| This hood is about 7' tall, and there was no access from above. It is a large hood, however, and it has room at the top to reach up and drive lag screws through the top and into structure above. A strong drill with an socket and and an extension can make this much easier. Once the hood is hanging from the top, drive screws into the wall as well to pull the hood tightly back to the wall. Instead of lag screws, threaded rods can also be pre-installed in the ceiling structure to match up to the bolt holes in the hood. The hood can then be raised onto the rods, and secured with nuts. The large size of this hood make it heavy, and we recommend either 4 people to lift the hood plus 1 more to secure the fasteners, or a mechanical lift to take the weight. The weight of a large hood like this one can approach 400 lbs. | |
|
| |
|
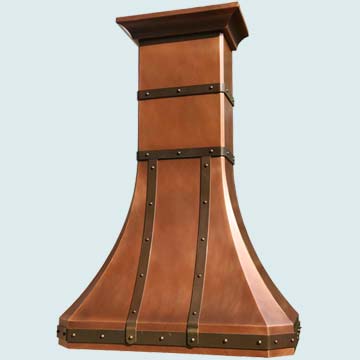
| This hood has a tall stack, which makes reaching fasteners at the top from inside impractical. This stack is a separate piece, and is best removed from the hood and installed separately. If there is access from above, threaded rod can be pre-mounted in the top plate of the stack. After the stack is raised into place it can be secured from above. If there is no access from above, we will provide inverted keyholes on the back of the stack. These keyholes will be placed over screws that you have pre-drilled into the wall. Once the keyholes are over the pre-drilled screws, the stack can then be slid up to touch the ceiling. Additional screws can then be run into the wall through the holes we provide at the bottom of the stack to pull stack back securely against the wall and hold it tightly against the ceiling. The studs that we provide on the bottom of the stack then allow the hood to be raised into place and bolted to the stack from inside the hood. | |
|
|
|